Martynn Randall is technical editor at Haynes and has been with us for approaching 30 years. He's written more than 60 Haynes publications and has owned more than 85 cars and 60 motorbikes... so far!
Are you a biker who uses their machine all year round, regardless of the weather, or do you tuck it away in storage to keep it safe from rain, mud and anything else winter brings?
Your answer will depend on which part of our great country you live in, of course, and there's no shame in switching to four wheels during the darker months.
Before you hit the open road, there are some important checks to take to make sure your bike is ready for spring. Motorcycle preparation involves looking at key components, such as the battery, tyres, and brakes. Is the battery holding its charge? Are the tyre pressures low? Don't forget to check the rear brake.
Fluids should be changed or topped up and you should inspect your bike for any signs of rust or damage that may have occurred during storage.
Here are 7 tips to get your motorcycle ready for fair-weather riding.
1. Tyre pressures and condition
Get your tyre pressure gauge out and check your motorbike's tyres and, if necessary, adjust them. Even good quality tyres on sound rims will often lose a little pressure after a couple of months.
The condition of the tyres should be carefully checked, too; make sure there's plenty of tread depth left. Obviously, they will not have worn during the storage period, but they can still deteriorate.
Check the sidewalls for any cracks, particularly if the tyre has lost a significant amount of pressure and the tyre has been flattened.
How old should a bike tyre get before you need to replace it? Opinions vary widely but at Haynes we recommend changing motorbike tyres when they're eight years old.

2. Will your bike’s brakes stop you in time?
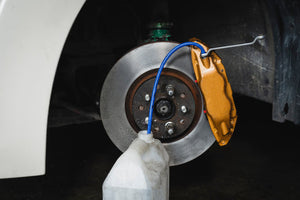
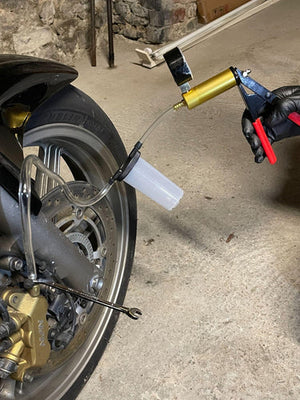
You need to make sure that the bike's brakes work when the front brake lever is pulled and the rear brake pedal is depressed, but you also need to make sure the brakes release properly. So check the brake on the front and rear wheels.
With the bike on the centre or paddock stand, make sure the wheels spin freely by rotating them by hand. As the wheel is spinning, apply the brake and check the wheel stops immediately. Then release the brake and check that the wheel can spin freely again.
Obviously, if there’s something not right, you need to investigate prior to riding the bike.
3. Can you be seen and heard?
Motorcycle storage for a few months during the winter shouldn’t cause any deterioration of the various electrical systems, such as the brake light, but it’s worth checking that all of the bulbs and LEDs work properly as part of your bike prep. Don't forget the horn, either, along with the instruments, indicator flasher relay, ignition and so on.
If the bike has been kept in a damp shed, some of those bulb or connector contacts may have corroded. If they have, a quick clean with Scotchguard (or similar) and a thin smear of ACF50 should have them working again.

4. Fuel for thought
Hopefully, when you put the bike into storage, you added fuel stabiliser to the contents of the petrol tank – or if your bike has carburettors, you drained the tank and the carbs?
If there’s still fuel in the tank, open the cap and take a sniff. If the fuel has gone stale it will smell quite rank. Stale fuel should be pumped or syphoned out and replaced with fresh.
If you did drain the tank and carburettors, check that the carb drain screws are closed, then add fresh fuel to the tank. Check for leaks and overflow as the fuel is added.
Sometimes those shut-off valves in the float chambers can stick after a period without fuel. If they are stuck, sometimes a gentle tap with a hammer is all it takes to 'wake' them up. If they’re really stuck, then the float chambers will need to come off.
The engine may well take a little longer to start than normal, and run a little erratically to begin with. If it doesn’t improve after a few miles, it’s worth trying a can of ‘fuel system cleaner’ in the tank.

5. Did you change the oil?
If the motorcycle’s engine/transmission oil was changed when you put the bike away all those months ago, you should only need to check the level. But if you didn’t, now would be a good time to change the oils and filter.
Ideally the engine should be warm before draining the old oil, but follow the procedure described in your manual. Old engine oil contains lots of contaminants, which will have separated out during the storage period. You don’t want that circulating around the engine.
On shaft-drive bikes, don’t forget to check and/or change the final drive oil.

6. How’s the chain looking?
If your bike has a final drive chain, place the bike on a centre or paddock stand, slowly rotate the rear wheel by hand and inspect the condition of the chain.
Hopefully, when you put the bike into storage, you cleaned it and applied your favourite chain lube, so it shouldn’t be rusty. But apply another film of lubricant to the drive chain now, anyway.
With the chain freshly lubed, check the chain tension as described in your Haynes manual. You shouldn't be able to see any daylight between the chain and the sprocket teeth. Also look at the sprocket's teeth – if you can see signs of wear change it and the chain at the same time.
7. Twist the throttle
Check that the bike's throttle twist grip rotates freely and returns to the stop position with a snap. If it’s stiff to open or returns slowly, you’ll need to lubricate the throttle cable. GT85 or a similar maintenance spray is the stuff to use. Don’t try to lubricate the cable with engine oil on modern bikes – it may be lined with a Teflon or nylon sleeve and the engine oil may cause the liner to swell, trapping the inner cable.
On manual transmission models, check that the clutch functions correctly. With the bike on its wheel, select first gear, pull in the clutch and try to move the bike forwards and back. After a few months of non-use, the clutch can often be reluctant to release, and the bike may only roll a few millimeters before coming to a stop. But don’t give up, keep rocking the bike and nine times out of 10 the clutch will ‘clear’ after a few attempts.
If the clutch still won’t clear but the lever feels like it’s working okay, a slightly more drastic method of clearing the clutch is to start the bike (preferably at the top of a slope), then get someone to push. As the bike is rolling and the engine idling, pull in the clutch lever and select first gear. Now, still holding the lever in, give the throttle a couple of sharp twists and the clutch will usually clear.
If this doesn’t work, the chances are that the clutch will need to be dismantled, cleaned and reassembled.
Ready to go?
Take it easy on that first ride check; it’s not just the bike that’s been in storage over the winter – your riding skills may need waking up, too.

